Getting Started
Contact us to get started
Reach out to the SyncStays team via the contact form, email, or phone. Share your hotel name and number of rooms — we'll create your account and have your dashboard ready, usually within a few hours.
We set up your room layout for you
Just share your hotel's room numbers, floor plan, or a quick list (e.g., 101–110, Deluxe Suite, 201–205) with the SyncStays team. We'll configure everything — no technical effort on your end.
Your timezone is set automatically
SyncStays detects your browser's timezone automatically so check-in dates, invoices, and the room grid always reflect your local time — no manual setting required.
Explore the dashboard
The main dashboard shows your full room grid. Green rooms are vacant, red rooms are occupied, and yellow rooms have a checkout due today. The top bar shows today's occupancy count, revenue, and quick-action buttons.

Check-In a Guest
Click a vacant (green) room
The booking form opens on the right side of the screen. You can also click the + New Booking button at the top and select a room from the dropdown.
Fill in guest details
Enter the guest's name, phone number, and optionally their ID number (Aadhaar, PAN, Passport, etc.). These are saved for future reference and invoice generation.
Set check-in and check-out dates
Choose the check-in date (today for a walk-in) and the expected check-out date. The number of nights is calculated automatically. For advance bookings, see the Future Reservations section below.
Upload ID document (optional)
Click Scan ID to use your device camera or upload an image. The AI reads the ID and auto-fills the guest name and number. Available on Elite plan.
Click Save
The room turns red immediately. The booking appears in the dashboard and is saved to the cloud instantly. No manual sync needed.
Billing & GST Invoicing
Open the active booking
Click any red (occupied) room on the dashboard. The booking detail panel opens on the right.
Go to the Billing tab
Inside the booking panel, click the Billing tab. You'll see fields for room charges, advance paid, and additional items.
Enter room charges and extras
Set the room rate per night (auto-multiplied by number of nights). Add any extra charges — laundry, transport, food — as line items with individual amounts.
Apply GST
Select the applicable GST slab (0%, 5%, 12%, or 18%). SyncStays computes CGST + SGST automatically and shows the final taxable amount.
Record the payment mode
Select Cash, UPI, Card, or Bank Transfer. This is printed on the invoice and tracked in the cash drawer.
Generate & download the invoice
Click Generate Invoice. A GST-compliant PDF is created and downloaded to your device immediately. You can also share it via WhatsApp or email.


Future Reservations
- Allotted — you assign a specific room right away. The reservation is locked to that room, visible in the Timeline view, and conflicts with other bookings on those dates are checked automatically.
- Unallotted — you save the guest details and dates but leave the room to be decided later. Useful when you're not sure which room will be free. The booking sits in the Upcoming list and can be allotted any time before the guest arrives.
Create a future booking — allotted
Click any green (vacant) room on the dashboard, enter guest details, and set the check-in date to a future date. SyncStays saves it as a reservation allotted to that specific room. The room stays green (not yet occupied), but the booking is locked in — no one else can be checked into that room for those dates.
Create a future booking — unallotted (room TBD)
If you don't know which room to assign yet, use the Upcoming Bookings panel (accessible from the top bar). Add the guest's name, phone, and expected dates without selecting a room. The booking is saved and listed under Upcoming, visible to all staff, but no room is reserved yet.
Allot a room when you're ready
Open any unallotted booking from the Upcoming list and click Allot Room. Select a room from the grid. SyncStays immediately checks for conflicts with other allotted reservations and active bookings on those dates — if there's an overlap, you'll be warned before saving.
Check in on arrival day
On the guest's arrival date, the reservation card shows an Arriving Today badge in the Upcoming list and on the Timeline. Click it and confirm check-in — the room switches to occupied (red) and the booking becomes active.
Timeline View
The Timeline view gives you a bird's-eye view of your entire property — every room, every booking, across a 14-day window (3 days past + 11 days ahead). It's the fastest way to spot gaps, plan allotments, and see what's arriving or departing on any given day.
- 📌 Each row = one room
- 📊 Each bar = an allotted booking (active or future)
- 📅 Today's column is highlighted
- 🟡 Yellow badge = arriving or departing today
- 👆 Click any bar to open that booking
- 📆 Click any empty cell to create a new booking for that room & date
- ⬅️ ➡️ Navigate forward/backward by day
- 🔄 Reset button returns to the current 3-day-back view

Check-Out a Guest
Open the occupied room
Click the red (or yellow, if checkout is due today) room on the dashboard. The booking panel opens showing guest details and stay duration.
Verify billing is complete
Switch to the Billing tab and confirm the final amount, advance received, and balance due. Generate the invoice now if you haven't already.
Click Check Out
Press the Check Out button. A confirmation prompt appears. Confirm to proceed.
Room is freed instantly
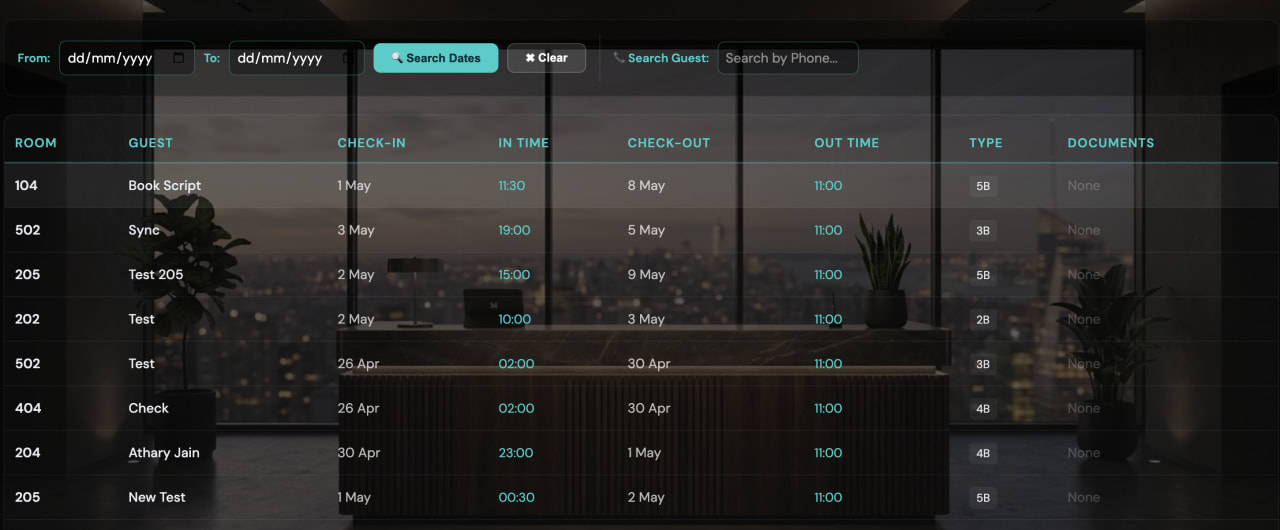
The room turns green on the dashboard. The completed stay is saved to Historical Stays, searchable by date, guest name, or phone number anytime.
Housekeeping
Open the Housekeeping module
Click Housekeeping in the top navigation. You'll see a task board with all rooms and their current cleaning status.
Create a cleaning task
Click + Add Task, select the room, choose the task type (Clean, Deep Clean, Linen Change), and optionally assign it to a staff member.
Staff updates the status
Housekeeping staff log in with their own account and see only their assigned tasks. They mark tasks as In Progress → Done from their phone or tablet.
Monitor from the admin dashboard
The main dashboard shows a housekeeping status badge on each room tile. You can filter to show only rooms Pending Clean after checkout.
Food Ordering (QR Menu)
Set up your menu
Go to Food Menu in the admin sidebar. Add dishes with names, prices, categories, and photos. Toggle items on/off to control availability.
Share the QR code with guests
Each hotel gets a unique QR link (e.g., syncstays.com/food/your-hotel-name). Print the QR and place it in each room. Guests scan it with any phone — no app download needed.
Guest places an order
Guests browse the menu, add items to cart, and place an order. They can enter their room number or verify via phone OTP so orders are linked to their stay.
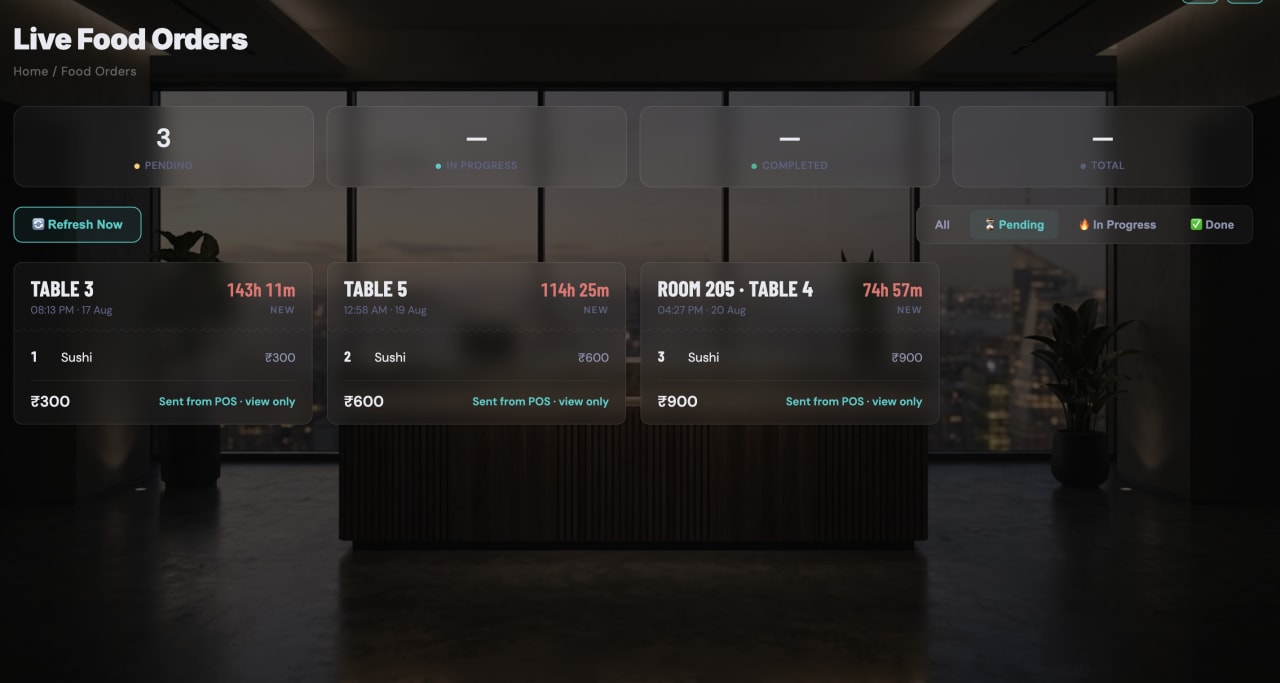
Kitchen receives a real-time alert
The Kitchen Dashboard (open on any device in the kitchen) shows a live notification instantly — no refresh needed. Staff mark each order as Preparing → Ready → Delivered.
Food charges added to bill
Food orders placed by a guest are linked to their room booking and can be pulled into the final invoice automatically at checkout.
Staff Management
Create a staff account
Go to Settings → Staff Accounts and click Add Staff. Enter their name, username, and a temporary password. Choose their role: Receptionist, Housekeeping, or Manager.
Staff logs in with their credentials
Staff use the same SyncStays login URL. They see only the modules permitted for their role — for example, housekeeping staff see cleaning tasks, not billing.
Track attendance
Go to the Attendance page to view daily login records for all staff. Attendance is marked automatically when a staff member logs in for the day.
Revoke access anytime
To deactivate a staff account, open their profile in Staff Accounts and click Disable. Their sessions are invalidated immediately.

Analytics & Reports
Open the Analytics section
Click Analytics in the top navigation. You'll see a summary of today's occupancy, revenue collected, and pending checkouts.
View occupancy trends
The occupancy chart shows daily and monthly fill rates. Use it to identify peak seasons, low periods, and average room revenue (ARR).
Revenue breakdown
See revenue split by room charges vs. food vs. extras. Filter by date range to compare months or track seasonal performance.
Guest history search
Go to Historical Stays and search by guest name, phone number, or date range. Pull up past invoices, re-download them, or look up repeat guests.
Expense tracking
Log hotel expenses (supplies, utilities, repairs) in the Expenses module. The analytics panel subtracts these from revenue to show your net position.
AI ID Scanning
Open the booking form
Click a vacant room to open the check-in form. You'll see a Scan ID button at the top of the guest details section.
Capture or upload the ID
On mobile, tap Scan ID to use the camera directly. On desktop, upload a clear photo of the ID. Supported: Aadhaar Card, PAN Card, Driving Licence, Passport, Voter ID.
Fields auto-filled
The AI extracts the guest's name and ID number and fills them into the booking form automatically. Verify accuracy and correct if needed before saving.
ID photo stored securely
The uploaded ID image is stored in your hotel's private cloud storage. Only your admin account and authorised staff can view it. Images are not shared or used for training.